Monday, April 24, 2023

Fiesta Chicken Casserole


  As I was mindlessly scrolling through tiktok videos, I happened upon a version of this recipe. Besides looking easy and delicious, I quickly realized that many of the ingredients happened to be on my wall of home canned items, so I knew this would be a good one to try. I must admit, I didn't exactly stick to the recipe from the video, though. I just suited it to what I had on hand. 
 For instance, it called for uncooked minute rice, but I used up some leftover takeout rice instead. It called for rotel tomatoes, but I used sliced stewed tomatoes. It called for chili seasoning blend, so I used cumin, chili powder, and paprika. Then I added some scallions for a little color and I also used two kinds of cheese instead of one, because why not? 
 So. as you can see, it's BASICALLY the same, but not exactly. But here's the thing... no matter how you make it, it still comes out tasting amazing! That's the beauty of a casserole. And since it only took literally 10 minutes to assemble, I think I'm gonna keep this in mind whenever I need to throw together a quick dinner. Having a Cinco de mayo party? This would be perfect! 
 I've listed it below as I did it, but you should make it the way YOU like it! Serve it up with some sour cream and a few tortilla chips. I promise you and your guests will love it!


2 cups cooked shredded chicken
1 can corn, drained
1 can black beans, rinsed and drained
1 15oz can diced tomatoes
2 chopped scallions
1 tsp chili powder
1 tsp cumin
1 cup shredded Cheddar cheese
1 cup cooked rice
1 can cream of chicken soup
1/4 cup milk
splash of Worcester sauce
1 cup shredded Mozzarella cheese 
Fresh chives, optional


Mix all ingredients except mozzarella cheese, then place in a large casserole dish.  
Top with mozzarella cheese. Bake at 350º for about a half hour or until bubbly. Garnish with a few chopped chives, if desired.


Tips:
Feel free to add some heat: Minced jalapeno or serrano peppers would be great. Or a few dashes of your favorite hot sauce. Or even just a pinch or two of crushed red pepper flakes. 
For some additional color and flavor, toss in some finely diced red, orange, green, and/or yellow bell peppers. 
And for a little bit of freshness, top with a little chopped fresh cilantro or parsley.

Monday, February 27, 2023

Easy Sauteed Cabbage and Sausage


 I was recently looking for something different to do with some leftover cabbage. I had bought a large head to be used in a green goddess salad, but then quickly realized how much yield you get from just one head of cabbage. Did you ever chop an entire head of cabbage??? It makes a TON! So I began to think of all of my favorite things to do with cabbage.. roasting it with bacon.... boiling it it ham... making cole slaw and topping a fabulous corned beef sandwich. But then, as I was going through the fridge, I remembered I had some leftover smoked sausage.... YES! THIS would be the easy simple fabulous meal I could make and use up some leftovers at the same time. Perfect! Just a simple saute, nothing complicated, super flavorful, and all done in one dish. I have to say... you often hear that "simple is best", and in this case, it's absolutely true. I found this recipe on a blog called Barefeet in the Kitchen, and it couldn't be simpler. 
 This is the perfect quick dinner for a weeknight, just as it is, or you could embellish it and make it a big Sunday Dinner. Serve it with your favorite potatoes and some crusty bread with butter. You'll have a winner! 
Now... lets see what other leftovers I can repurpose...


    1 lb kielbasa smoked sausage
    1 1/2 tbs olive oil, divided
    1 medium onion, chopped
    3 garlic cloves, minced
    1 small head cabbage, cored and chopped
    3/4 tsp kosher salt, plus more to taste
    1/2 tsp freshly ground black pepper
    1 tsp red wine vinegar


     Halve the kielbasa lengthwise and then slice it into 1/2-inch pieces. Heat a large deep skillet or dutch oven over medium heat.  Add 1/2 tablespoon oil and the kielbasa. Toss to coat and then cook until browned, about 3 minutes per side. Transfer the kielbasa to a plate.
    Return the pan to the stove and reduce the heat to medium low. Add the remaining tablespoon of oil and the onion. Cook, stirring occasionally, until the onion has softened. Add the garlic, cabbage, salt, and pepper. Toss well to combine. Cover and cook, stirring every 4-5 minutes until the cabbage is wilted, about 12 minutes.
    Stir in the vinegar and return the kielbasa to the pot. Stir and cover for about 3 more minutes, until the cabbage is tender and the kielbasa is hot. Taste and add salt, if needed. Enjoy!
 
 
Tips:
  The cabbage usually brings a lot of moisture to the pan, but if your final dish seems a little bit dry, feel free to add a splash or two of chicken broth, or even just water.  
 Not a fan of kielbasa? Use any favorite sausage! The flavors will be slightly different, but it will all work!
  I enjoyed mine over some mashed potatoes, but feel free to choose any other kind of potato... Baked, fried, gratin, anything you like! I also love doing potato bundles... just slice a potato, but keep the slices together, add a few slices of onion and a pat of butter along with salt and pepper. Then wrap the whole thing in some heavy duty foil to make a sealed packet. Bake in a hot 400º oven or on the grill until potatoes are done, about 45 minutes.
 

Monday, February 20, 2023

Joey's Slow Cooker Teriyaki Beef


    I was in the mood for a slow cooker kind of beef something. You know, like when you let it cook all day in the slow cooker until it just falls apart? Yes, that. But I wasn't feeling my usual go-to beef stew with potatoes and brown gravy vibe. So, I thought, why not do something fun and new? To be quite honest, my original thought was to do something with lots of toasted spices, sort of in an Indian inspired direction... with lots of onions, garlic, ginger, and garam masala. But then I took a quick inventory of my pantry ingredients and decided that a fabulous teriyaki might be the way to go. Ok then! We have our heading!
  Now, of course, it would be easy to just open up a bottle of purchased teriyaki sauce and call it a day, but I always have more fun making it home made, Don't you? I must admit that I only had a general idea of what goes in a good teriyaki sauce, but I figured , how hard can it be? I knew I wanted it to include pineapple juice and soy sauce, and I absolutely love the flavor of toasted sesame oil. I also figured it would probably have honey and brown sugar, but this was as far as I could go on my own. So I did what I always do! I started with those ingredients, googled a few recipes, took what I liked from each one, and made my own! I took one taste and YES! It turned out beautifully! Don't you just love when that happens? And it was super easy too. I just threw everything into the slow cooker, gave a stir, and let it cook all afternoon. You can't get much easier than that, right?  I thought of browning the beef before throwing it in, which would absolutely be fine, but I just wanted a quick set up an no extra dishes to worry about. THIS was it.
  Just set it up in the morning for an easy week night meal, or do like I did and make it for a fabulous Sunday supper. Pour it over some cooked white rice and you're good to go! Hope you'll give it t a try!


2 cups pineapple juice
1/4 cup honey
1/4 cup ketchup
2 tbs brown sugar
1 tbs soy sauce
1 tbs rice vinegar
1 tbs toasted sesame oil
2 tbs Hoisin sauce
2-3 cloves garlic, minced
1 tbs fresh ginger, minced 
3 scallions, sliced
2-3 lbs beef chuck, cubed 
 
 
For thickening the sauce:
2 tbs corn starch
2 tbs cold water or pineapple juice 
 
Garnish:
More sliced scallions
sesame seeds


Add all of your sauce ingredients into the insert of your slow cooker. Give it a good whisk until it's all well combined. Now add the scallions and beef cubes. Give it another stir until the meat is well coated. Cook on low for about 8 hours, or on high for about 4 hours. 
 When the beef is tender, stir together the corn starch and water (or juice, if using). Add to the sauce, and stir. If your slow cooker is on low, turn it to high, and let it cook for about 15-20 more minutes, uncovered, until the sauce is thickened. This is the perfect time to make the rice, so that everything is done at the same time. To serve, pour your beef and sauce over a mound of rice, add veggies on the side, garnish with more sliced scallions and a sprinkle of sesame seeds, if desired.


Tips:
 Be sure to adjust seasoning after it's cooked. Sometimes it needs more salt or soy sauce than you think it will!
  If you'd like to stretch the meal a little further, add some beautifully colorful steamed vegetables on the side. Some broccoli florets or sugar snap peas would be absolutely perfect. You can put them on for steaming around the same time as you cook the rice!
  You can use this same recipe for chicken as well. Just add your boneless chicken to the crock pot with your sauce, and cook it on low for about 6 hours. Then remove the chicken to thicken the sauce. While the sauce is thickening, you can shred the chicken and add it back to the slow cooker. Come to think of it, that would be FABULOUS in a lettuce wrap! Yum. 
  When you add the corn starch for thickening, be sure to stir it into COLD liquid (either the water or the juice) before adding it to a hot liquid. If you add it directly to the sauce, it will clump into little starchy blobs, and no one wants that!

Monday, January 2, 2023

Joey's Cheesy Corn and Sausage Dip


   This is one of those recipes I just threw together with what I had on hand, and I must say, I nailed on the very first go, thank you very much!
 My sister was having a casual hang at her house, and as usual, I offered to bring something. Very often, I'll volunteer as dessert tribute, but this time I opted to bring an appetizer. I figured I have plenty of things I can throw together for a warm baked dip, why not? I wasn't following any recipes, but just used a few tried and true ingredients and figured it would all come together. How hard can it be, right?
 At first, I had thought of doing it in the crock pot, but then realized the timing wouldn't have worked for me, so I just baked it in the oven. I was so pleased with how it turned out, I think I might need to make this again the next time my friends and I get together! And if you happen to have a favorite big sporting event coming up, yes you should DEFINITELY make this for your guests. I PROMISE it'll be a hit!


1 lb  bulk breakfast sausage (I used Jimmy Dean)
1 8oz bar cream cheese
1/2 cup sour cream
1/2 cup mayonnaise
1 cup shredded Mozzarella cheese
1 cup shredded sharp Cheddar cheese
1/4 cup grated Parmesan cheese
1 small (4oz) can diced green chilis
2 cups corn (any kind will work- fresh, frozen, or canned)
4 scallions, chopped
Splash of Worcestershire sauce
Salt and pepper

Heat oven to 350ºF.
Place bulk sausage in a skillet over medium heat. Break it up as it browns.
Meanwhile, combine all remaining ingredients and mix well. I just used my mixer with the paddle attachment. Add browned sausage to your cheese mixture, and stir well. Adjust seasoning with salt and pepper if needed. Keep in mind that the sausage will flavor the dip, so be careful not to add too much salt.
Pour mixture into a small casserole dish. Top with a little extra Mozzarella and/or Cheddar cheese. Bake in oven for about 40 minutes or until hot and bubbly. Serve with butter crackers or tortilla chips.


Tips:
If you're using canned corn, be sure to drain it well before adding it to the mixture,
Not a fan of corn? Try adding some chopped broccoli instead. You could even do spinach, if you'd like. Just thaw frozen chopped spinach and squeeze it as dry as you can before adding it to the mixture.
For an extra added touch, top everything with some crumbled bacon after you bake it.
Feel free to turn up the heat, if you so dare. Add some sriracha, Tabasco, or use a spicy sausage. You could also add some minced jalapenos. 


Monday, December 5, 2022

Apple Pie Snickerdoodles

  I recently got together with my nephew, Tommy, for our yearly tradition of putting up his Christmas tree. It's something that we started many years ago when he asked for a little advice with his tree, and I was all too happy to help. This year, we were joined by my niece, Katie, and she brought a tin of FABULOUS Snickerdoodles. YUM! She told me how easy they are to make, and we discussed how much we liked the fact that the recipe uses butter instead of shortening as with other recipes. So she gave me the recipe. Thanx Katie Kate! It's called Grandma Ruth's Easy Snickerdoodle Cookies, and she got the recipe from Allrecipes.com. Frankly, I have no idea who Grandma Ruth is, but she certainly has a fabulous cookie recipe!! And when I was invited to a friend's house for a little Christmas Hang, I immediately thought of these cookies, and figured they would be great for the party. But then I wondered what I could do to make them extra special. I remembered seeing a tiktok video where a guy used purchased sugar cookie dough in muffin tins, then added pie filling to the center and I thought YES, that's the answer! I just happened to have some apple pie filling and it seemed like all the planets aligned perfectly for this dessert to happen. 
 OMG... when I tell you that they are delicious, I mean they are DELICIOUS. The buttery cookie crust, the apples and the cinnamon.. it was like they were meant to be together!! Everyone at the party absolutely loved them, and I'm pretty sure the entire tray was gone by the end of the party. 
 Now, of course, if you want to just make them into regular Snickerdoodles, you certainly can, and I promise they'll make the perfect addition to your Christmas cookie tray. But if you happen to have a can of apple pie filling, I urge you to go the extra mile. You and your guests will be glad that you did! Promise!


Cookie:
1 1/2 cups white sugar
1 cup softened butter
2 eggs
2 3/4 cups all purpose flour
2 tsp cream of tartar
1 tsp baking soda
1/4 tsp salt

Coating:
2 tbs sugar
2 tsp cinnamon
 
Filling:
Purchased or homemade apple pie filling
 
 
 Heat oven to 400ºF.
 Beat 1 1/2 cups white sugar, butter, and eggs together in a bowl using an electric mixer until smooth and creamy. Combine flour, cream of tartar, baking soda, and salt in a separate bowl; stir into creamed butter mixture until dough holds together. 
Form dough into 2-tablespoon-size balls and roll in the cinnamon-sugar mixture. Place dough balls in greased muffin tins. 
Bake for 6 minutes. Remove from oven. Reduce oven temperature to 350ºF. 
Using the bottom of a shot glass (or other similarly sized item), press a well into the center of each cookie. The dough will still be raw in the center, but the well will keep its shape. Fill each well with a tsp of canned apple pie filling. Place the muffin tins back into the oven for another 5 minutes, or until the cookie dough is set. Remove from oven and let them cool completely before removing them from the tins. You can put the tins in the fridge to speed this process. Use a fork or the pointy end of a knife to help you pop them out of the tin. 


To make the regular Snickerdoodles:

After you mix the filling as directed above, line a baking sheet with parchment paper or lightly grease, form dough into 2-teaspoon-size balls, and roll in the cinnamon-sugar mixture. Place dough balls, about 2 inches apart, on the prepared baking sheet.  Bake in the preheated 400º oven on the center rack for 7 minutes. Allow cookies to cool on the baking sheet for 5 minutes before transferring to a wire rack. 


Tips:
You definitely want to cool them completely or chill them in the fridge because they'll be too soft when you take them out of the oven and you don't want them to break when you take them out of the muffin tins. 
When you open the can of pie filling, if the chunks of apple are quite large, just chop them up a bit so that the apple pieces will fit nicely into each cookie well. 
 I was originally going to drizzle a little glaze over them after cooling, but then decided that they're just perfect without any additional glaze. But if you'd like to guild the lily, just add a few splashes of water or apple juice to some icing sugar until it's the right drizzling consistency, then pour a little over the top of each Snickerdoodle. You could also do a drizzle of caramel sauce, but I think I prefer to let the cinnamon and apples be the stars of the show. 

Original cook's notes:
When removing cookies from the oven, they make look doughy still. By allowing them to continue to cook on the cookie sheet out of the oven prevents hard cookies. For storing cookies, place cooled cookies in a plastic container or plastic bag with a piece or two of bread to keep cookies soft.


Sunday, November 13, 2022

Light and Fluffy Dairy Free Mashed Potatoes


Usually, when I'm choosing recipes, my first thought naturally goes toward what I like to eat. But then it occurred to me that very often people have food allergies and can't eat certain things that I take for granted.

 So today I decided to do a delicios recipe for mashed potatoes that doesn't have all the heavy cream that I usually add. But how do you make it rich without all the cream?? The answer is coconut milk! Yes, yes, I know, crazy, right? But seriously, trust me on this. No, it does't make them taste like coconut. It just adds the richness that you want! Add whatever seasonings you like, and there you go. Perfectly fluffy delicious mashed potatoes without any of the problems that might come with dairy. 

Surprising? Yes. Delicious? Absolutely! !


5 lbs Yukon Gold potatoes, peeled and quartered

1 1/2 cups chicken broth

1 can coconut milk

4 tbs ghee, melted 

Salt and pepper

Chives


Place potatoes and chicken broth in a slow cooker. Cook on low for 8 hours until fork tender.

Scoop the potatoes out of the slow cooker, and push them through a potato ricer set at its finest setting. 

Shake the can of coconut milk before you open it.  Now stir in the coconut milk a little at a time. 

Do the same with the melted butter and any broth left in the slow cooker. 

Season with plenty of salt and pepper.  Top with chopped chives.


Tips:

Usually, at this point, I'll mention what I believe to be the "key" to the recipe. Well, in this case, there are several:

First, you want to make sure you use the right kind of potato. Yukon Golds give you just the right amount starch without turning into spackle. 

Next is the potato ricer. If you've never used one, it kind of looks like a giant garlic press, and it's the best tool for mashing potatoes. Of course, you can use a hand masher, but I wouldn't use a mixer. Again, spackle.

Have you ever used ghee? It's just clarified butter with all of the milk solids removed. It works much better for people who don't do well with dairy. Of course, regular butter also works.

And finally, it's all about flavor! Use any seasonings you like. Garlic powder, onion powder, seasoned salt, all good! And remember, it will need more salt than you think it will!

Cooking the potatoes in chicken broth adds lots of flavor too, but you can easily keep it Vegan. Just use Vegan butter, and use water or a vegetable broth.


Tuesday, November 8, 2022

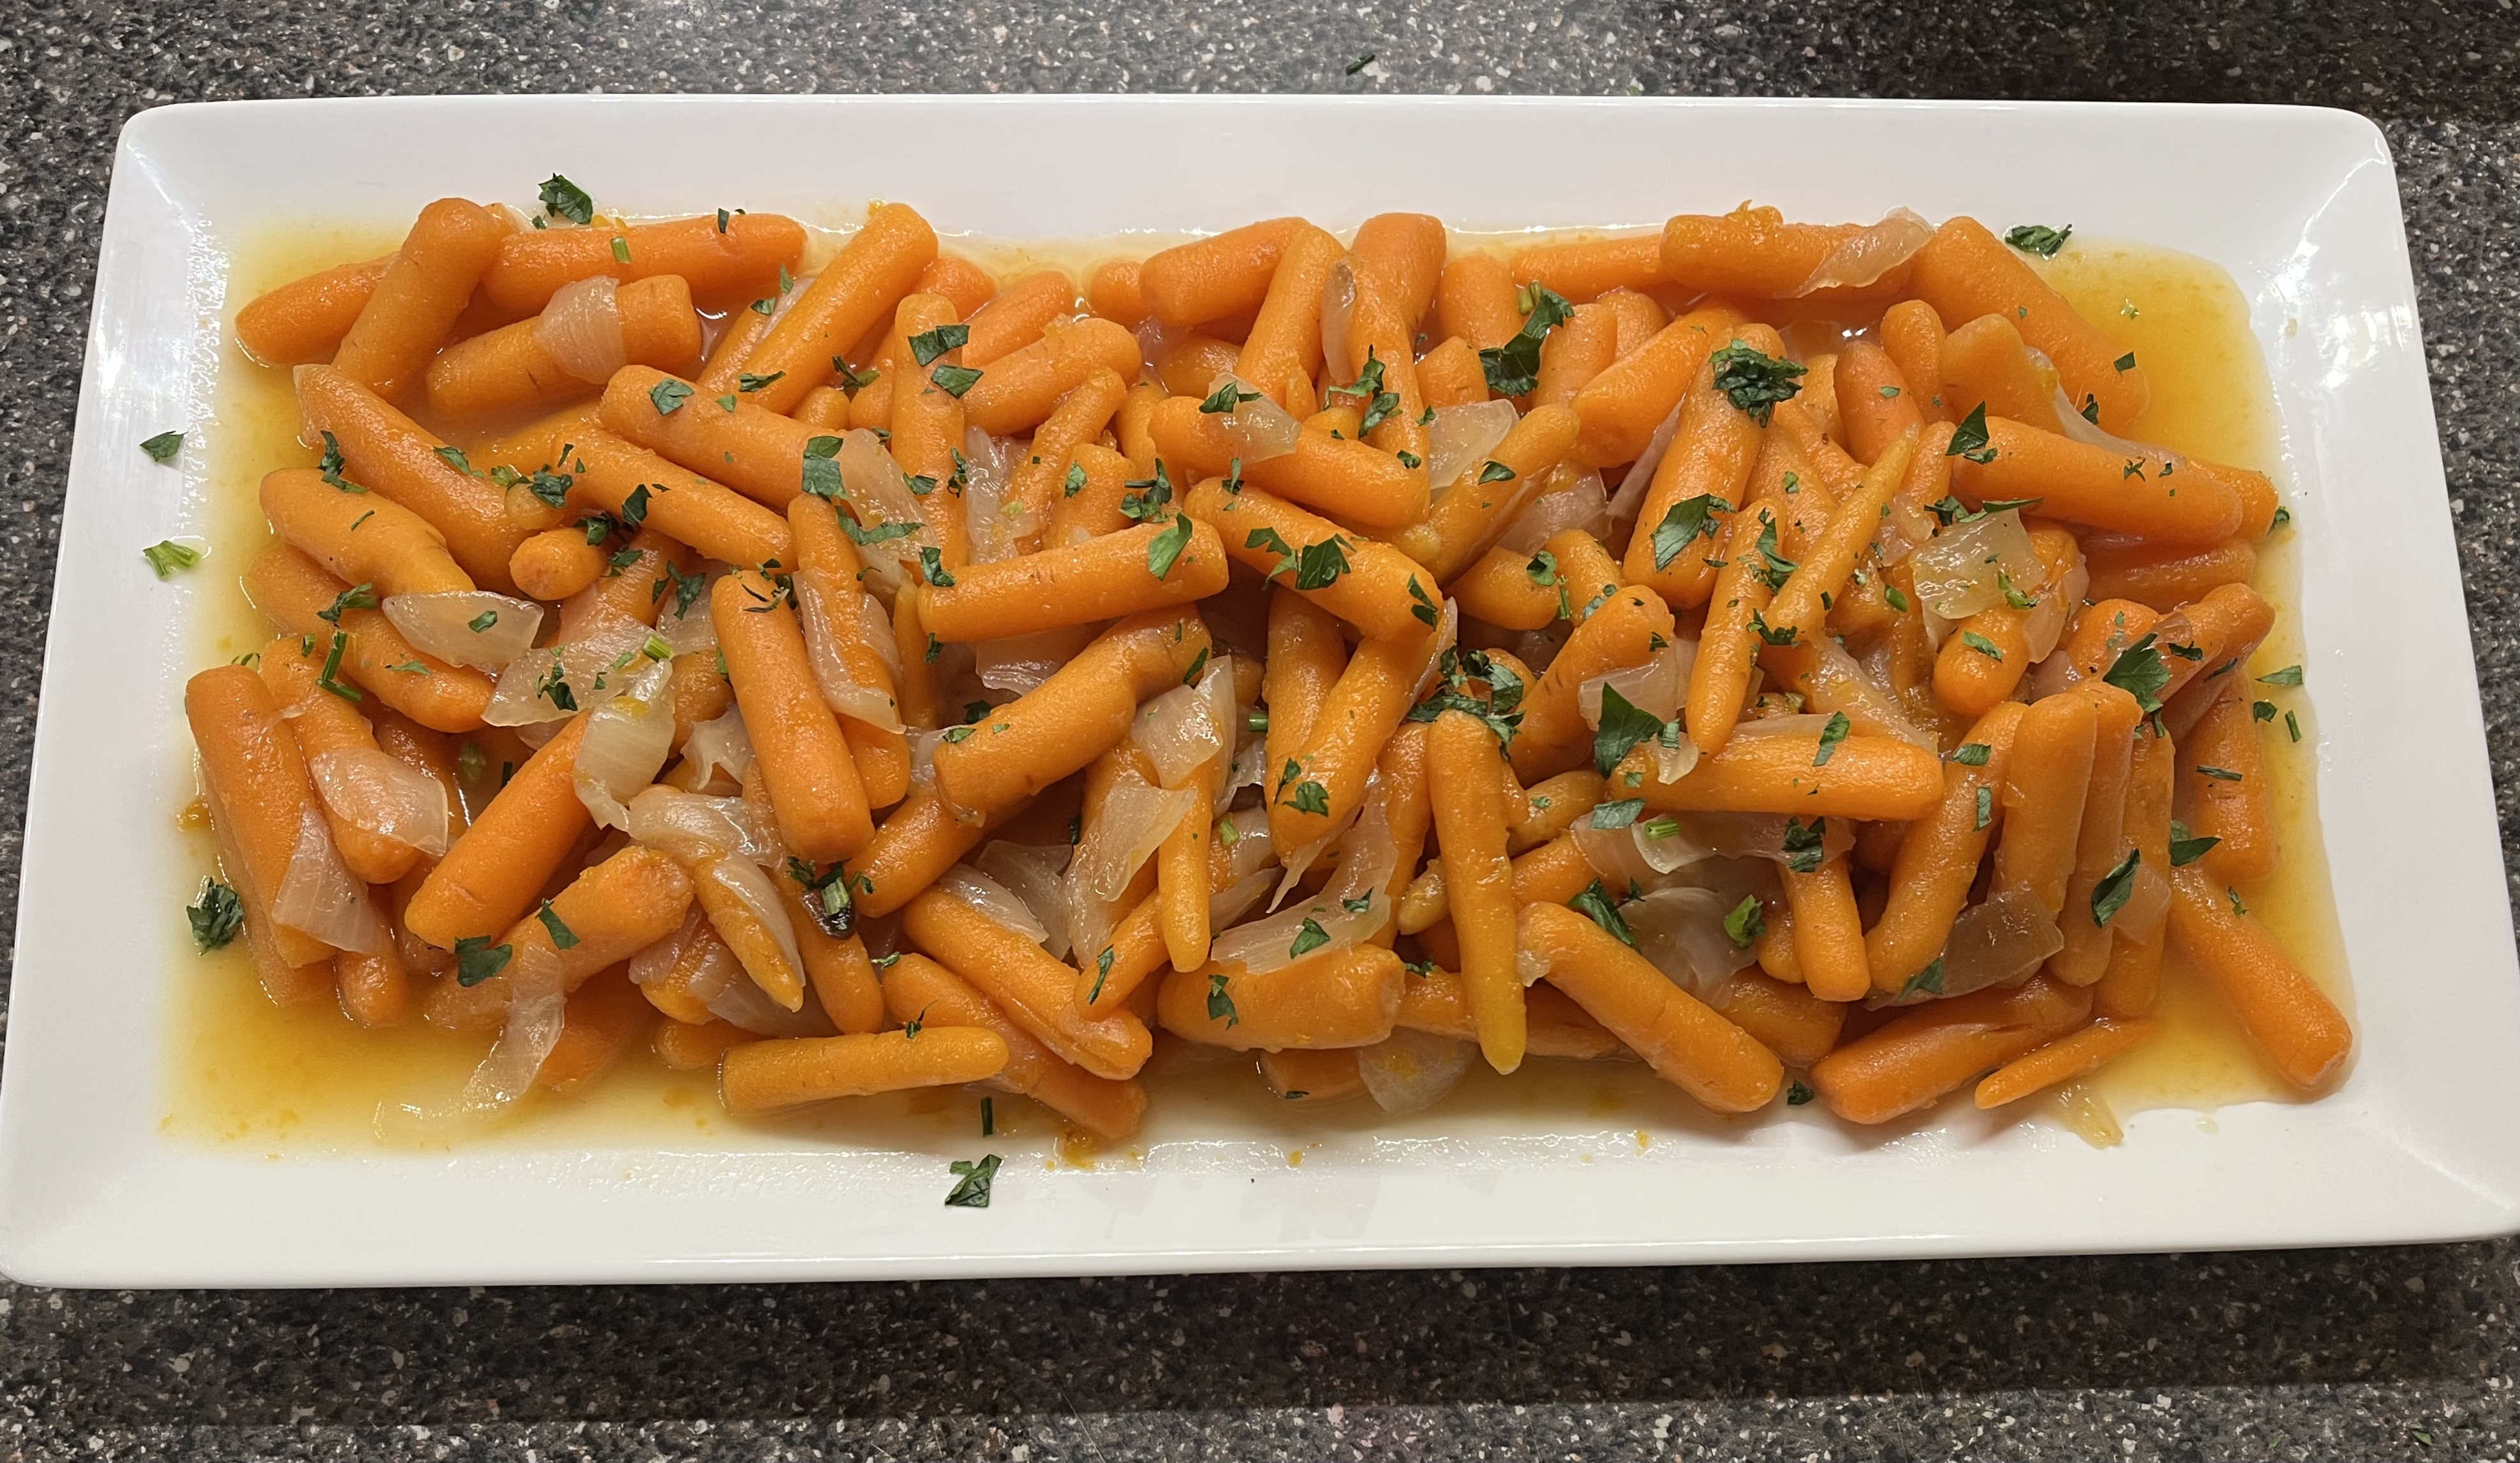
Slow Cooker Apricot Glazed Carrots


Here's a side dish recipe that is so easy you won't believe it. It takes literally 5 minutes to prep in your slow cooker (as far in advance as you'd like), and then all you have to do is turn it on. It doesn't get easier than that! This qualifies as one of the easiest most delicious Thanksgiving recipes I've ever tried, and believe me when I tell you that's saying something!! Oh, and one other thing, if you think you don't like carrots, give this one a try. It just might change your mind! 


2 lbs baby carrots
1 medium onion, sliced
1/2 cup water
1/4 tsp salt
1/3 cup honey
1/3 cup apricot preserves
2 tbs chopped fresh parsley


In a 4-5 quart slow cooker, place carrots, onion, and water. Sprinkle with salt. Cover. Cook on low for 8-10 hours or on high for 4-5 hours. Discard any liquid in cooker. Toss carrots with honey and preserves. Turn to high. Cover. Cook for addition 10-15 minutes. Garnish with fresh parsley on top. Serve. 


Tips:
Whenever I buy bags of baby carrots, I find that some are thinner than others. Choose the ones that are thicker. They'll do much better in this recipe. Don't want baby carrots, use regular carrots! Just peel them and cut them into bite sized pieces. 
Not a fan of apricots? Use any favorite fruit jam. I looked for hints from The Betty Crocker Kitchens, since thats where I found this recipe.. they said that "peach, plum, pineapple or another flavor preserves will lend these carrots a subtly different yet equally delicious fruit flavor." I couldn't have said it better!
Oh, btw, the original recipe did not include the half cup of water. I was worried that it would be too dry, so I added the water. Since we drain it anyway, it just made sense to me!