Tuesday, July 14, 2026
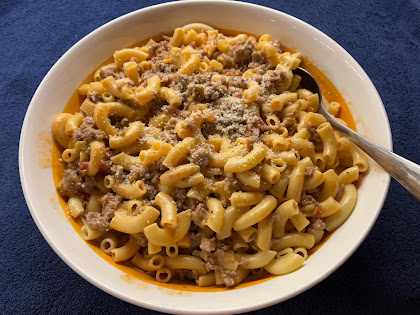
Joey's Zucchina Pastina
Monday, April 6, 2026
Slow Cooker Pork Ragout
But what to make?? I’m sure that when I bought it I was thinking I’d do a BBQ pulled pork in the slow cooker, but now I’m thinking “how ‘bout something different?”
Enter this recipe. You may be asking what is a ragout? Well a ragout (or ragu) is an Italian dish of braised meat (usually pork) in a tomato sauce with aromatics, herbs, and wine, finely shredded and then served over a hearty wide pasta. Sounds heavenly, right? Yeah, I thought so too. And since I pride myself on keeping a well stocked pantry, I just happened to have all the rest of the ingredients to make it.
First and foremost, I have to say this was just about the easiest thing to throw together, and the payoff was AMAZING. It was only about 15 minutes of prep, and then it cooked all day, low and slow, filling my house with the most intoxicating aromas. It was so good that it could literally be an option for my next dinner party. It’s just that good. (Hmm.. actually, that’s a really good idea.)
I made this during the biggest snow storm in the last 10 years, but you don’t have to wait for it to snow to make this recipe. Make it for a Sunday Dinner. Make it for a holiday. Make it for your friends. Make it just for yourself! It’s definitely a good one to keep in your back pocket. I actually already wanna make it again. (Not even kidding!) Good thing I still have another pork in the Snow Miser!
Olive oil
3 or 4 lb pork shoulder
1 onion, minced
2 carrots, peeled and finely diced
1 28oz can tomato puree
1 6oz can tomato paste
A couple sprigs of fresh thyme, leaves removed and stems discarded
1 tsp poultry seasoning
1 tsp dried basil
Salt and pepper
1/2 cup red wine (such as Chianti or Merlot)
1 heaping tsp chicken Better Than Bouillon
2 cups water
In a very hot skillet, in a little oil, brown the pork on all sides. Meanwhile, throw everything else into your slow cooker.
Place the pork in the slow cooker, nestling it down into the sauce. Cover and cook on low for 8 or 9 hours, or until the pork shreds easily.
Using two forks, pull the pork into fine shreds, removing any fat, stirring until well combined.
Tips:
When browning the pork, don’t move it around in the skillet. I know you want to, but resist the urge! Just leave it alone, and you’ll get a nice brown sear. Do this one all sides. Conversely, you can certainly just skip this step altogether, and it will be just fine. But I believe it gives a richer deeper flavor with the browning.
A few things you can substitute:
Crushed tomatoes instead of puree.
Dried thyme leaves instead of fresh.
Vermouth or just a splash of red wine vinegar instead of the wine.
2 cup of chicken broth instead of the Better Than Bouillon and water.
Instead of cooking on low for 8 or 9 hours, you can cook it on high for 4 or 5, but I always prefer lower and slower if you have the time.
Even though pork is the classic choice for this recipe, it also works very well with beef. Just be sure to cook it long enough so the meat shreds easily.
If you’d prefer to cook this in the oven instead of the slow cooker: Brown the meat in a heavy pot with a lid, throw in all the sauce ingredients, then place in a low-ish oven, around 325ºF, for about 3-4 hours.
Saturday, February 28, 2026
Easy Peasy Cheesy Pasta
Sunday, January 4, 2026
Joey's Slow Cooker Classic Meat Sauce
1 lb ground Italian sausage (mild, hot, or half of each)
2 28oz cans crushed tomatoes
1 15oz can tomato puree
1 6oz can tomato paste
3 cloves garlic, minced
1 small onion, minced
Salt and pepper to taste
1 tsp dried basil
1 tsp dried oregano
1/2 tsp dried thyme
1 or 2 small bay leaves
Pinch of crushed red pepper flakes.
Handful of grated Parmesan cheese
Brown the meat in a saucepan, breaking it up as it cooks. Meanwhile add all other ingredients to your slow cooker.
When the meat has mostly browned, drain any excess fat, then add it to the pot.
Cook on low for 8-9 hours or on high for 4-5 hours. Remove lid for the last hour of cooking time to let the sauce reduce a little. Serve over rigatoni, tagliatelle, or tortellini. Top with more grated cheese, if desired.
Monday, October 27, 2025
Joey's White Chicken Goulash
Very often, when I’m planning a party menu, I like to give options to my guests. I like the idea of a “choose your own adventure” kind of a dinner. I once hosted a dinner with 3 different kinds of pasta and 3 different kinds of sauce, so my guests could mix and match. Last year, I hosted a bonfire with 3 kinds of soup, and 3 kinds of bread to go with them. See what I mean? You get the idea. For another party, I made a crock pot full of home made mashed potatoes as a base, and then offered a choice of 3 different kinds of stew to pour over them. HUGE hit! Not only does it offer a variety, but I must say, I do love it when everyone goes back to try the other flavors.
So then I was thinking of Fall and Halloween, and some good hearty “stick to your ribs” kind of comfort foods, and I remembered making my Ghoulish Goulash. If you’re not familiar, it’s a tomato based beef stew with lots of paprika and spices that you serve over egg noodles. And of course there’s the favorite classic American Goulash, which is ground beef and elbow macaroni in a tomato sauce. And I thought, wait… what if I do a white chicken version? That’s gotta be delicious, right? So I started googling. Oddly enough, just about every version of chicken goulash that I could find still had a tomato based sauce, instead of the creamy version that I was looking for. So, (you know what I’m gonna say, right?), I made my own!
I started with ground chicken and elbow macaroni, and since goulash typically includes a lot of paprika (which is made from ground dried peppers), I opted to add chopped red bell peppers. Then I rounded everything out with a few other aromatics and herbs and tied it all together in a creamy sauce. YUM! It turned out exactly as I had pictured in my head and it was just the hearty comfort food I was looking for. It just happens to be the perfect thing to serve on Halloween or any other crisp fall night when you want something warm and comforting. Come to think of it, now I can serve two kinds of goulash at my next bonfire party! Boom.
1 medium onion, chopped
1 red bell pepper, chopped
2 cloves garlic, minced
Salt and pepper
1 tsp fennel seeds or caraway seeds
1 tsp dried oregano
1 lb ground chicken
2 (10oz) cans condensed cream of chicken with herbs soup
1 cup milk
4 oz cream cheese
1 lb elbow macaroni
Sweet paprika for garnish
In a large pan, heat the oil over medium heat. Add the chopped onions and peppers. Saute until they begin to soften. Now add the garlic, fennel seeds, and dried oregano. After they become fragrant, (just a minute or two), add the ground chicken. Continue to stir and sauté to break up the chicken. When the chicken is just about cooked through, add remaining sauce ingredients. (The cream cheese will melt through). Reduce the heat and let it simmer for about 10 minutes. Meanwhile, boil the elbow macaroni according to package directions. Drain the pasta, reserving a cup of the cooking water. Toss the cooked macaroni with the chicken mixture. If it’s too thick, add a little of the pasta water to desired consistency. Adjust seasoning, if needed. Top with a sprinkle of paprika and serve.
Tips:
If you don’t have elbow macaroni, you can easily swap out any other kind of cut pasta. You could even just make the chicken and sauce and then pour the whole thing over wide egg noodles. Then you could choose your own sauce to noodle ratio.
Be careful with the oregano. I find it to be a very strong herb, which can sometimes overpower a dish. Dried marjoram would be good substitution!
I like to bash the fennel seeds around a little with a mortar and pestle, just to get them going, but you can just throw them in. They add a subtle but distinctive anise flavor, which I think is key. But if you’re not a fan, just leave 'em out. It won’t be exactly the same, but it’ll still be awesome!
Monday, October 6, 2025
Easy Tortellini Pesto Alfredo
With school back in session and schedules getting crazier with each extracurricular activity, as far as I'm concerned, any way you can get dinner on the table is a good one. Even if you have to "cheat" and use all store bought ingredients. Dinner is dinner, right?
So keep this one in your back pocket. It's as easy as can be, your family will thank you for it, and you'll feel better knowing that everyone has a full belly.
No one needs to know that you didn't make everything from scratch!
32 oz cheese tortellini
1 (14.5 oz) jar purchased Alfredo sauce
1/2 cup jarred basil pesto sauce
1/2 cup heavy cream
1/2 tsp sugar
16oz shredded mozzarella cheese
Heat oven to 350ºF.
Boil tortellini 2-3 minutes. Strain and place in a casserole dish.
Meanwhile, stir together Alfredo sauce, pesto, sugar, and cream.
Pour over tortellini.
Top with half of the mozzarella. Gently stir the tortellini so the cheese gets mixed into the sauce a bit. Top with the other half of the cheese. Bake for 15 minutes or until the cheese is melted and the sauce is bubbly.
Tips:
This sauce is great on ravioli or any other kind of pasta. Just sayin'!
For some extra fun, stir in few sliced sun dried tomatoes.
If you want to make home made pesto or home made Alfredo sauce, who am I to stop you??
The sugar is only included because sometimes the basil in the pesto can have a slight bitterness to it, especially if it's home made. Just omit it if it doesn't need it!
I didn't add Parmesan cheese because there is already plenty in the Alfredo sauce and in the pesto as well. But if you want more, you do you!
For a little extra zing, add a pinch of crushed red pepper flakes!
Tuesday, July 29, 2025
Sausage and Cabbage Tortellini Alfredo
So I started looking for ideas.
Hmm.. I was thinking maybe something for the stove top (no hot oven).. something in one pot (no extra dishes to wash) and something that is quick and easy to throw together. Right.
Then I saw someone on the tick tocks making a Sausage and Cabbage Alfredo. Oooo YUM. That's it! So I gave it a try. Sounds delicious, right? WRONG. I made it exactly as it was written, and it was absolutely terrible! It was so over seasoned, I couldn't even eat it. Crazy, right?? Of course, I should have known better. I knew it seemed like too much seasoning as I was cooking it. Ah well. Live and learn, I suppose. But I still loved the idea, and I knew I could do better, so I started over.
First and foremost, I knew the smoked sausage would have enough spice for the entire dish, so I literally cut out all other additional seasonings. I didn't even add salt. It was all already ready already.
Second, I knew I could make my own Alfredo sauce, but frankly, I was going for the super easy short cut, so I just used a jar of Prego and called it a day. I'm certainly not above using a jar of marinara sauce for spaghetti, so I'm definitely not above using a jar of Alfredo sauce.
And finally, I decided to add bacon and tortellini, because why not?
Let me just say, OMG it was absolutely delicious!!! THIS, Ladies and Gentleman, was what this dish wanted to be all along. It also fits all the criteria and it came together in a snap.
Bonus, it feeds a crowd and you won't break the bank. Perfect, right??
So keep this one in mind the next time you don't really feel like cooking. I promise your family will thank you!
5 or 6 strips bacon, chopped
1 small onion, sliced
1 lb any kind of smoked sausage, spicy or mild, sliced into coins
1/2 of a medium green cabbage, cored and sliced into ribbons
1 14oz jar purchased Alfredo sauce (I like Prego)
1/2 sauce jar of milk
1 lb cheese tortellini
Parmesan cheese
Place the bacon in a cold large pan or dutch oven over medium heat, not too high. Let the fat slowly render. Now add your sliced onions and sausage coins. Continue to sauté and stir over medium heat until the meats begin to brown and the onions begin to soften.
Add your sliced cabbage. Give everything a good toss. Cover. Let it steam for a few minutes, then remove the cover and toss again, making sure to scrape up any brown bits from the bottom of the pan. Continue to wilt the cabbage until crisp tender. Now add the tortellini and jar of Alfredo sauce. Fill the jar halfway with milk to rinse out the remaining sauce and add to the pot. Gently stir everything to combine. It should only take a few minutes to heat through. When the tortellini is done, you're ready to serve. Sprinkle a little grated Parmesan cheese over the top. Garnish with a little chopped fresh parsley, if desired.
Tips:
Be sure to start out with a big pot. I have a big enamel plated cast iron pot that works nicely.
If your bacon doesn't give you enough fat to sauté the sausage and onions, go ahead and add a little olive oil.
There's no need to add any extra liquid for cooking the tortellini. The cabbage gives off enough moisture to take care of it. If you find that the sauce is too thick for your liking, add a little drizzle of milk.
Feel like making your own Alfredo sauce? Who am I to stop you???
If you're counting carbs, just cut out the tortellini.
Don't like tortellini? Pour it over wide egg noodles or rigatoni! Just cook them according to package directions. Easy!
Monday, March 31, 2025
Orzo with Asparagus and Peas
1/4 cup balsamic vinegar
1 tsp sugar or honey
1 tsp kosher salt
lots of freshly cracked black pepper
3/4 cup oil
In medium sized mixing bowl, whisk together all of the ingredients except the oil. SLOWLY add the oil in a steady thin stream while vigorously whisking constantly. (you can also use a mixer with a wire whisk attachment).
Wednesday, November 6, 2024
Joey's Slow Cooker Cowboy Lasagna
Anyway. recently I was pressure canning pints of chili for chili dogs, and I also did a big batch of Sloppy Joes. Most of the jars sealed up perfectly, but then there were a few that didn’t seal. So that left me with two choices. I could either process it in the pressure canner again, or I could just put it in the fridge and eat it sooner than later.
I opted for B.
I transferred all of the unsealed jars to a larger container. And then I got to thinking.. “well, now, what am I gonna do with all this chili/meat sauce?” I could do a hot-dogs-and-chili sort of casserole, I could make nachos, I could just simply have a bowl of warm chili with some shredded cheese and sour cream on top… hmmm..
Then I thought, what about a lasagna? Only instead of Marinara sauce, I could use the chili as the meat sauce. Perfect! I thought, oooo that sounds like it should be called Cowboy Lasagna. So I googled it, and whadya know, Cowboy Lasagna is already a thing! Who knew? I googled some more and found a few different recipes and it basically this was my flight of ideas:
… hmm.. this one has sausage in it.. I just happen to have some sausage! great.. … next.. peppers, onions…awesome.. got ‘em, perfect… what else… cheese? Yup.. Cheddar and Mozzarella.. so far so good.. what else.. a few spices… ground cumin, paprika, definitely…. It needs something fresh… parsley! YES…. Keep googling other recipes… oh look.. this one has pepperoni on the top.. I have that too!
It kind of cracked me up, because it felt like I was cleaning out my fridge and using up all of my leftover ingredients that all just happened to work for this recipe. I guess my biggest “outside the box” moment was when I added a little cream over the noodles instead of doing ricotta or cottage cheese. I really just wanted to focus on the meat sauce and noodles, instead of doing a whole cheese layer. Adding a drizzle of cream was just the right amount of richness. One might even call that the A HA moment. Well, that and the fact that I had half of a container of heavy cream in the fridge, waiting to be used up.
So there we have it. Cowboy Lasagna, all thrown together while I was on my lunch break, and ready by the time I arrived home for dinner. Easy, delicious, comforting, and perfect for a Fall dinner.
Vegetable oil
1 lb Italian sausage (hot and/or mild)
2 bell peppers, any color
1 medium onion
4-6 cups of your favorite chili
A handful of chopped fresh parsley
A few shakes of each:
Ground cumin
Paprika
Dried oregano
Salt
Black pepper
1 box uncooked lasagna noodles
16 oz shredded sharp Cheddar cheese
16 oz shredded Mozzarella cheese
Heavy cream
Pepperoni slices
Add a few glugs of oil to a large skillet. Remove sausage casings (if needed) and brown the sausage over medium heat, breaking it up as you go. Add the chopped peppers and onions, and continue to sauté.
When the meat is brown and the veggies are soft, pour everything into a giant mixing bowl. Add the chili, parsley, oregano, and spices. Stir until well combined.
Spray your biggest slow cooker with non stick cooking spray.
Now do a layer of dry lasagna noodles, breaking them into smaller pieces as needed to complete the layer. Drizzle just a little heavy cream over the noodles, (not too much!) then sprinkle with a little of each kind of shredded cheese.
Do this 2 or 3 more times, or as many layers as your slow cooker will allow.
Now place slices of pepperoni across the top and sprinkle with a little more chopped parsley. Cover and cook on low for 5 hours. At this point, it'll be very soupy, so it's best to turn off the heat and let it set up for a bit before cutting into it. Serve with a big dollop of sour cream on top.
Tips:
All of the amounts are just guide lines. If you like a lot of something, add a lot!
If you don’t have chili already made, you can use Hormel, or just make a meat sauce with ground beef and tomato puree, then add chili seasonings to it. If you're not sure what spices go in chili, it's easiest just to add a packet of ready made chili seasoning, like Chili-O.
I didn’t add beans, but you absolutely can. Any kind you like! Just rinse and drain them, then toss them into your meat mixture. Red, black, any kind you like! You could even just add a can of regular pork and beans, sauce and all. Or even a can of corn. It will all work!
Feel free to add any kind of hot peppers, crushed red pepper flakes, Tabasco Sauce, or any other kind of heat, as much as you dare. You do you!
If you don’t have a slow cooker, this recipe can also be made in a regular 9x13 casserole dish and then baked in the oven. Bake it at 350º, covered, for about an hour. And while it’s baking, go on Amazon and buy yourself a slow cooker.
Sunday, March 24, 2024
Joey's Pasta and Tomatoes with Tuna Sauce
Tuesday, June 27, 2023
Ham and Pea Pasta Salad
Here's a recipe I saw Miss Lori making on Whippoorwill Holler, (one of my favorite youtube channels.) Of course, I kind of tweaked the amounts here and there, and I may or may not have added a little extra seasoning, but it's basically the same as it was written. It's really the perfect recipe for a big BBQ because you can make it the day before, and it feeds about a million people. Tweak it however you like, add more/less or omit any of the ingredients as you prefer, and season it to taste. Easy peasy. Literally!
1 lb box elbow macaroni, cooked
3 hard boiled eggs, diced
2 green onions, minced
2 tomatoes, seeded and diced
1 cup shredded Cheddar cheese
1 large rib celery, finely diced
2 cups frozen peas, thawed
1 cup diced ham, or more if desired
1 can water chestnuts, chopped
1 cup mayo, or more as needed
Salt and pepper to taste
Sprinkle of fresh dill
1 packet Good Seasons Italian dressing mix
Crumbled bacon on top, if desired
If you make it the day before, just store it covered in the fridge, and then give it another stir before you serve it, adding a little more mayo, if needed.
No, you do not have to cook the frozen peas. Just thaw them. Since they're flash steamed before they're frozen, they're ready to eat!
For a little extra zing, add one or two tbs of brown mustard. You wont really taste it, but it will make everything taste brighter!
Sunday, January 16, 2022
Joey's Spicy Sausage Mac and Cheese
Monday, May 31, 2021
Peas and Pasta Salad
I was recently making a giant VAT of BBQ sauce, you know, just to have on hand for all of my favorite summer BBQ dishes, and I was trying to think of side dishes to go with them. In my world, that usually means potato salad, cole slaw, or macaroni salad. MMM macaroni salad… now there’s something I haven’t had for a while… maybe lets try to find a new variation? Want to?
So I did some searching, and here’s where I landed! It’s a Food Network recipe from Sunny Anderson, and I figured, why not?
So.. here’s the thing.. full disclosure.. I made the recipe exactly as written.. and I already decided to change a few things. Usually I would save all the tips and variations for after the recipe, but I think this one needs to be said first.
Well, first, as I was making it, even before tasting it, I wanted more color.. so I added some red bell pepper.. chopped down to a fine confetti. Looks great! OK now to taste it…
whoa… it’s very sweet. Like, VERY sweet. I mean, it does make sense, sweet side salads are a very Southern thing, so that tracks. But it was just a little too sweet for me. The Miracle Whip is very sweet, the peas are sweet, and she even adds sugar. Then I went and added the red bell pepper, which is also sweet.
My brother Denny was here while I was making it, and we decided that the bacon, onion, and cheddar cheese go a long way to balancing that sweetness, as well as a good hit of salt and pepper.
So there we have it! A new macaroni salad recipe to try! How sweet do YOU like it? Give it a try and let me know!
1 pound cavatappi pasta
Kosher salt and freshly ground black pepper
1/4 cup finely chopped red onion
1 (15-ounce) jar salad dressing (recommended: Miracle Whip)
1 tablespoon apple cider vinegar
1 tablespoon Worcestershire sauce
1 1/2 teaspoons sugar
10 ounces frozen peas, thawed
1/2 cup shredded sharp Cheddar cheese
6 slices bacon, cooked until crisp and crumbled
Cook the pasta in salted boiling water as directed on box for al dente, about 8 minutes. Drain and place the cooked pasta in a large bowl filled with ice water to stop the pasta from over cooking. Stir until the pasta is cool, then drain in a colander shaking to release as much water as possible.
To make the dressing: In a large bowl mix the red onion, salad dressing, apple cider vinegar, Worcestershire sauce, and sugar. Taste and then season with a pinch of salt and grind or two of pepper. Add the pasta and completely coat with the dressing. Add in the peas, cheese, and bacon. Cook's Note: If making ahead, cover and refrigerate the salad until ready to serve, then add the bacon right before serving.
Tips:
As I said, it was just a little too sweet for me. I think I’d prefer to get the natural sweetness from the veggies, rather than adding sugar and Miracle Whip. So I would just use regular mayonnaise, (and by that I mean Hellman’s) and then just omit the sugar completely. Also, I liked it better after it had a chance to sit for a while, so, if you can make it a little ahead of time, do it!
Monday, May 24, 2021
Cioppino Linguini
Have you ever heard of a dish called Cioppino? It’s seafood stew from San Francisco that was originally meant to use up the extra sea critters that were accidentally caught in fishermens’ nets. From what I understand, it was originally served as a stew, but I’ve also seen it served as a soup along with some hearty crusty bread. Well, I thought, what if we make it into a thicker sauce and pour it over linguini??? That’s gotta be nothing but fabulous, right?? Now all I needed was an occasion to cook up all this wonderful seafood.
AHA! I know.. I’l cook it for my gang of friends! Since we’re now all safe and healthy, and we can FINALLY have group get togethers, and since most of them have not seen my new house, this was the perfect time to try out my Cioppino idea. I made it an entire seafood night!
Mini salmon cakes (which were a HUGE hit) and crab dip were my appetizers, and this linguini was the main course. I used a Tasty recipe as a base, and then just tweaked it ever so slightly…Served with a nice salad, and then followed up with carrot cupcakes and lemon trifle for dessert. I’m pretty sure no one was hungry by the time they left! And everyone LOVED the pasta.
So whether you serve it as a stew, a soup, or poured over linguini, this is the dish you need to serve to the seafood lovers in your life. Definitely good enough for your next celebration meal!
2 large carrots, peeled
2 ribs celery
1 bulb fennel
1 large leek, rinsed well
1 onion
1 red bell pepper
1 green bell pepper
6 or 7 cloves garlic
1 tbs EACH dried oregano, basil, thyme leaves
2 bay leaves
1 6oz can tomato paste
1 bottle clam juice
3 cups white wine, divided
2 28oz cans crushed tomatoes (with water to rinse out cans)
A couple big pinches of salt
1-2 tsp (or more) crushed red pepper flakes
A dozen little neck clams
1/2 lb mussels
1/2 lb shrimp
1/2 lb large scallops
1 lb cod fillet
Finely mince first 8 ingredients. (It's easiest to pulse everything in a food professor until almost pureed). Add a few tbs olive oil to a large pot over medium heat. Place minced aromatics in pot. Stir well. Let them cook for a good 10-15 minutes, stirring often, until they begin to soften.
Add oregano, basil, thyme, bay leaves, and tomato paste.
Continue to cook and stir for another 5 minutes.
Add clam juice, 2 cups white wine, and the canned tomatoes. Swirl each can about half full with water, add to the pot.
Add a big pinch salt and a tsp or two crushed red pepper flakes.
Bring the sauce up to a boil, then reduce the heat to a simmer. After it simmers for about a half hour, it's ready for the seafood, but you can let it go longer. (I let mine go for at least an hour). You can even go up to this point a day in advance. While your sauce is simmering, prepare your seafood.
Remove shells and devein shrimp. Keep cold. Set aside.
Scrub mussels and clams. Discard the ones with broken shells. If you see one that is open, give it a little tap tap with your finger. If it doesn't close, discard it.
If the mussels have a beard, just pull it off. Now soak the clams and mussels in a bowl of ice cold salty water. Let sit for 15 minutes. Do this two more times.
Keep ice cold.
Cut the cod into bite size pieces.
Now it's time to add the seafood to the sauce.
Shrimp and pieces of cod can be added directly to the sauce.
In a large skillet, place a little olive oil over high heat. Place scallops in hot pan. Sear on each side. Set aside. Add a little butter to the pan. Add the clams and mussels and a cup of white wine. Cover. Let stem for a good 10 minutes. Remove cover and dump the clams and mussels along with wine and butter into sauce. Fish out the bay leaves. Stir it all together. Let it simmer until all the seafood is cooked in the sauce. Taste to adjust seasoning.
Boil linguini to desired doneness.
Place in giant pasta bowl, pour sauce over all. Top with a little chopped parsley, if desired. Serve with lots of hearty crusty bread.
Tips:
I chose these kinds of seafood because they’re the ones I like best. Choose which ones you like! I’ve seen recipes where people add salmon, even squid. You do you! I bet a big ol’ crab leg or two would be heavenly. If you want to add more seafood than the amounts I've listed, go for it!
I found that adding about 1 tsp crushed red pepper flakes brings just the right burn to the dish… but if you want it to be really spicy, feel free to add more.
I you’d rather have it as a soup or stew, just use an immersion blender to blend the sauce smooth before adding the seafood, and then skip the linguini. Frankly, I love all the chunky bits in the sauce, so I just left it as it was!
Monday, February 22, 2021
Joey's Favorite Broccoli and Cheese Mac
Ok ok, I know I have MANY recipes for mac and cheese, but seriously, can one have too many?? I think not! So this is another variation. It’s literally as simple as it sounds: Regular mac and cheese with broccoli added to it. Simple, right? But it’s definitely proof that sometimes the simplest things are the best.
Now, before you cheese purists out there go all Judgey McJudgerson on me about using Velveeta “processed cheese product”, all I have to say is don’t knock it ’til you’ve tried it! I’m not saying I don’t love cheddar or Swiss or any other variety of gooey cheese… but I just love how Velveeta melts, and it’s ALWAYS a big hit. Not only that, I just love how it tastes. I don’t even care if it’s not REAL American cheese. I still wind up cutting off little chunks for tasting whenever I use it. (It’s great in an omelette btw, and it makes fabulous queso!)
This recipe is basically a riff on my sister Jeanie's recipe, and it's my go to for all things mac and cheese. It's a great side dish for, say, a ham dinner, and it also goes great with your Sunday roast. You can also just leave it as a stand alone dinner. This is definitely a great one to keep in your arsenal of recipes!
2 crowns fresh broccoli, cut into florets
1 lb cavatappi noodles or other favorite cut pasta
4 tbs butter
4 tbs flour
4 cups milk
2 tbs prepared mustard
1 lb Velveeta cheese, cubed
Heat oven to 350ºF.
Spray a large casserole dish with nonstick cooking spray.
In a large pot of salted boiling water, add broccoli florets. Stir them around for a minute or two, and then scoop them out, using a slotted spoon. Place them in the casserole dish. Set aside.
Add the pasta to the same boiling pot of water. Stir them around so they don’t stick together. Let it boil until about 2 minutes before they’re done.
Meanwhile, in another sauce pot, over medium heat, add the butter until melted. Add the flour and whisk to form a paste. Let it cook for about a minute, then add the milk, mustard, and cubes of velveeta. Stir over medium heat until the cheese is melted, and the sauce has thickened.
Drain the pasta, then add to the broccoli. Now pour the cheese sauce over the broccoli and pasta. Stir to coat well and evenly distribute the broccoli throughout the dish. Place casserole in oven, and bake for about 30 minutes or until bubbly. Let stand for a good 10 minutes before serving.
Tips:
Make sure you include the mustard. It makes the sauce taste cheesier!
Don’t like broccoli? Try another veggie instead! How about asparagus? or how about carrots and cauliflower? Seriously any veggie will work.
For an added touch, sprinkle some shredded cheddar over the top before you bake.
For an EXTRA added touch, add some panko bread crumbs and grated Parmesan cheese to a little melted butter. Then sprinkle the buttered bread crumbs over the top for the last 10 minutes of baking. Perfectly golden crust!
Monday, January 18, 2021
One Pot Creamy French Onion Pasta Bake
So, I was trying to remember where I first saw this recipe. I think it was in a text thread with one of my sisters..or my nieces… but I have no idea.. anyway… it was one of those “We should make this some time” sort of texts, and I immediately added it to my list of foods to try. (Yes, I have a list. Don’t you?)
It seemed like the perfect thing to make during the colder months when everyone is looking for something warm and comforting. It’s from a blog called Half Baked Harvest, and it was described as being a cross between mac and cheese, and French onion soup. You can’t get more warm and comforting than that!!!
First of all, is was REALLY easy to make, especially since you do everything in one pot. I transferred it to a baking dish, but if your pot is oven proof, you could just put the whole thing in the oven. One less dish to clean!
So if you like French onion soup. This has your name written all over it. Thank you again to Tieghan over at Half Baked Harvest for the fabulous recipe. I’ll definitely be making this one again soon!
4 tbs butter
2-3 medium yellow onions, thinly sliced
2 tsp honey
1 cup dry red wine, such as Cabernet Sauvignon
2 cloves garlic, minced or grated
2 cups cremini or wild mushrooms, sliced
2 tbs fresh thyme leaves (or 2 tsp dried thyme)
Kosher salt and black pepper
3 cups low sodium chicken broth (use vegetable broth, if vegetarian)
1 tbs Worcestershire sauce (use soy sauce, if vegetarian)
2 bay leaves
1 pound of your favorite short cut pasta
1/4 tsp cayenne pepper, using more or less to your taste
1 1/4 cups heavy cream, whole milk, or canned coconut milk
1/3 cup crumbled gorgonzola cheese (optional)
2 cups shredded gruyere cheese
Heat the oven to 400ºF.
Melt the butter, onions, and honey together in a large pot over medium-high heat. Cook, stirring occasionally until softened, about 5 minutes. At this point, you want to slowly add 1/2 cup of the wine, 1/4 cup at a time, until the wine cooks into the onions. Continue to cook another 8-10 minutes until you've used the 1/2 cup of wine and the onions are deeply caramelized.
Add the garlic, mushrooms, thyme, and season with salt and pepper, cook another 3-4 minutes. Add the remaining 1/2 cup wine, the broth, Worcestershire sauce, bay leaves, and the pasta. Bring the mixture to a boil. Stir frequently until the pasta is al dente and the broth has been absorbed, about 8-10 minutes. Stir in the cayenne, cream, gorgonzola, if using, and 1/2 cup gruyere cheese. Remove from the heat.
If needed, transfer the pasta to a baking dish. Top with the remaining gruyere cheese. Transfer the baking dish to the oven and bake 20 minutes or until the cheese has melted and is lightly browned on top. Cool 5 minutes before serving. Serve with fresh thyme. Enjoy!
Tips:
Even if you’re not a fan of bleu cheeses, I definitely recommend adding the gorgonzola to the dish. You won’t even taste the “bleu-ness” of it, but it makes the flavor SO much deeper and richer. SO good!
If you can do free thyme instead of dried, DO IT. I always prefer fresh herbs over dried ones. It makes all the difference in the world. I also added a little fresh parsley over the top for a little pop of color!
Btw, one of the notes listed with the recipe is that you can use half pomegranate or cranberry juice and half chicken broth in place of the red wine. I was actually wondering if pomegranate juice was an option even before I read the note. It’s nice to know my hunch was correct!
Monday, September 7, 2020
Joey's BBQ Chicken and Baked Bean Casserole
Ok, sooo......just go with me on this one, k?
I had a crazy idea. I know. I know. That's not exactly new. But this was a GOOD one! If you know me, or at least if you follow my recipes, you know I can't just leave a recipe alone. I'm always trying to come up with different things to do with it. In this case, I wanted to try something new with baked beans. I have to say, I'm pretty famous for my Baked Beans, thank you very much. So I kept thinking "what else can I do with them?" I've done casseroles with ham and beans, rice and beans, and chili dogs. I've done maple beans, pineapple beans, and of course, you can't go wrong with Trisha Yearwood's Baked Bean Casserole. But then I thought, instead of always doing pork and beans, what if we do BBQ CHICKEN and beans instead? I thought, ooo I bet that would go great with some mac and cheese. (ok, here comes the crazy part) .... and then I thought.. what if I do a casserole that combines all three??? BBQ Chicken, baked beans, mac and cheese, all in one. That sounds pretty amazing, dontcha think?! I asked my nephew, Gregger, if that sounds like it would be good.... I won't tell you EXACTLY what he said, but suffice to say he was 100% on board, and immediately volunteered to be a taste tester. LOL
So, where to start? Well, I found a recipe for one of those Bubble Up Bakes. Do you know the ones I'm talking about? It's a casserole that uses canned biscuits. You cut them up, toss them with your casserole ingredients, then bake it. The biscuit pieces puff up and there you have it, Bubble Up Bake. Now, I've tried them before, even shared recipes for them. But my issue is that the biscuit pieces in the center never seem to bake all the way through, and you're left with big pockets of raw biscuit dough. (Cue the Price is Right loser music). Not exactly what I want in a casserole. So basically, I just used that recipe as a springboard for this recipe. Swapped the biscuits for pasta, added a few of my own tweaks, and here we are! Chicken, beans, pasta, cheese, all in one big hearty casserole. All you need is a fresh crisp salad and there's dinner! I must say, it's pretty awesome. I knew I definitely wanted it to be a pasta dish, but I didn't want to just toss some baked beans with pasta. So That's where the can of tomatoes comes in. Full disclosure, when I first made the sauce, I thought "wow, that is FAR too much sauce", but then when I mixed everything together, it turned out to be the right amount! The pasta really drinks it in! Btw, this recipe makes a GIANT casserole. What can I say? I can never seem to make a casserole that fits into a 9x13 casserole dish. I always start adding things, and then the next thing I know, I have the casserole that ate New Jersey. Sorry not sorry! Luckily, my sister gave me a GIANT casserole dish that always seems to accommodate my casseroles. Normally, I'd try to scale things back for the sake of posting the recipe, but this time I'm owning it. So, you can either cut the amounts back to fit your 9x13, split it into two casseroles (and freeze one), or use a giant dish that will feed an army. LOL Also, one more thing, there are a couple steps to the recipe, so I'm gonna ask you to multitask, but it's all pretty simple to do. I have complete faith in you. If you give this a go, let me know how you like it! And also, if you have any other ideas for baked beans, send 'em my way! I've love to give them a try!
1 lb cavatappi or other cut pasta
6 slices bacon, cut into small pieces
1 onion, roughly chopped
flour, salt, and pepper for dredging
1 pkg boneless skinless chicken (3 or 4 breast halves)
1 28oz can baked beans
1 28z can tomato sauce
1 cup BBQ sauce
1/4 cup brown sugar
2 tbs mustard
1 tbs kosher salt
1 tsp black pepper
1/2 tsp liquid smoke (optional)
16 oz cheddar cheese
8 oz mozzarella cheese
Heat oven to 350ºF.
First, boil the pasta: Add a handful of salt to a pot of rapidly boiling water. Add the pasta and cook according to package directions, but drain it a minute before reaching al dente. Drain well.
In the meantime, add the bacon to a cold skillet. Place it over medium heat. Gradually brown the bacon, making sure you render a good amount of fat from it. When the bacon starts to crisp, add the chopped onion. Saute until the onions begin to soften. Meanwhile, prepare the chicken. Yes, I know. Pasta boiling, bacon and onions cooking, yes, I'm asking you to multitask. I told you! What, you thought I was kidding? You can do this! Stay with me...
Place a bit of flour in a shallow bowl, enough to dredge the chicken. Add salt and pepper. Cut up chicken to small bite size pieces. Dredge in seasoned flour until evenly coated. Pat away excess flour (you can also use a ziplog bag to shake them for easier cleanup!).
Remove the bacon and onions from the pan and place in a very large mixing bowl, leaving the bacon fat in the pan. Add the chicken pieces to the pan. Lightly brown the chicken on all sides, adding an extra drizzle of oil when needed, but don't cook all the way though. Do this in batches, so as not to crowd the pan.
While the chicken is cooking, add the rest of the sauce ingredients to the mixing bowl... the baked beans, BBQ sauce, tomato sauce, brown sugar, mustard, liquid smoke (if using), salt, and pepper. Add the chicken to the bowl as you remove it from the saute pan. Add the drained pasta and half of the cheddar cheese to the bowl. Toss all until well coated. Pour into sprayed casserole dish(es), either one large casserole, or two small ones. (it definitely won't all fit in a 9x13, but like I always say, More is More!) Top with remaining cheddar cheese plus all of the mozzarella. Cover with foil. Bake for 30-40 minutes or until heated through. Remove foil and bake for 15 more minutes. Let sit for 10 minutes before serving.
Tips:
Yes, Yes, I know there are several things going on at once. Just stay organized and you'll be fine. To save time, you could make each of the components ahead of time, say, the night before. And then when you get home from work, toss them all together, pour into your casserole dish, and bake. Actually, you can even do the whole thing the night before.... assemble it and all, then cover it and pop it in the fridge until you bake it the next day.
Monday, June 8, 2020
Joey's Fusilli Col Buco with Ham and Peas
I was recently looking for fun and different ways of using up some leftover ham, and I saw a recipe for pasta with ham and peas. This was exactly they type of thing I was looking for, and honestly, my first thought was "oooo I bet that would hit the spot!"
Of course, I didn't exactly follow the recipe, and I sort of made it my own, adding some onions and white wine, etc. The result was very possibly one of the best pasta dishes I've ever made. Like, EVER. I'm not even kidding! After having a big pasta bowl of it, I immediately texted my brother with a picture, saying "want some?" He texted me back later that night saying that it was SOOOO good!
I'm not sure if it was the wine, or the cream, or the grated cheese.. but it definitely all came together perfectly. And one of the things that I really love about it is that the flavor of the peas really comes through. It was just the perfect sweetness to go with the saltiness of the ham and the Parmesan cheese. And it was ready in as little time as it took to boil the pasta. Perfect!
I might need to add this to my weeknight dinner repertoire. You should too!
1 lb fusilli
4 tbs butter
1 small onion, diced
3 cloves garlic, minced
2 cups diced ham
4 tbs flour
2 cups milk
1 cup cream
1/2 cup grated Parmesan cheese, plus more
Splash or two of white wine
1 1/2 cups frozen peas
Salt and pepper to taste
Fresh parsley
In a large pot of salted boiling water, cook fusilli according to package directions until al dente.
Meanwhile, in a large saute pan, melt butter over medium heat. Add onions. Saute until they soften, but don't let them go so far as to brown. Add diced ham and garlic and continue to saute for a few more minutes. Add flour. Stir for 2-3 minutes until everything is well coated. Add milk, cream, and grated cheese. Season with salt and pepper. Continue to stir and simmer over medium low heat until the sauce thickens. Stir in a splash or two of white wine and then add frozen peas. Taste and adjust seasoning, if needed. Drain cooked pasta and toss with sauce. Top with fresh parsley and more Parmesan cheese.
Tips:
If the sauce becomes too thick, the wine will thin it out a little. If it's REALLY thick, add a splash of water until it's the right consistency.
Be sure you aggressively salt the pasta water. Like, two big HANDFULS of salt should do it. You want the water to taste salty like the ocean.
Use whatever pasta you have on hand! I just happened to like the long spirals, so that's what I chose!
Don't like ham, use chunk of boneless chicken instead! You could even use shrimp! oh YUM!
Monday, May 18, 2020
Joey's Chicken Parm Tortellini Bake
This dish was born out of what I happened to have on hand in my pantry. I didn't even know that "Pantry Pasta" was a thing, but that's exactly what this is... I took a brief inventory of what I had in the freezer and pantry, and all signs pointed to this, so here we are!
TBH, it's not very groundbreaking, but boy did it hit the spot! So I figured, yup, this definitely needs to be shared! It's all very simple, not very many ingredients, and it's ready in no time. No need to boil the tortellini in advance, it cooks in the sauce! The other thing that makes this recipe very simple is that there's no measuring. A bag of frozen tortellini, a jar of marinara sauce, a block of mozzarella cheese. It all comes together quite nicely!
Ya know, sometimes we stand there forever with the fridge door open, thinking "there's nothing to eat." Well, sometimes, you just have to look at what you have and then see what you can do with it! Words to live by!
1 small onion, diced
2 cloves garlic, minced
2 or 3 boneless chicken breasts
1 lb frozen tortellini
1 28oz jar marinara sauce
8 oz mozzarella cheese, shredded
Parmesan cheese, optional
Heat oven to 350ºF.
In a large skillet, saute diced onions in a little oil over medium heat. Add garlic and saute for another minute or two. In the meantime, cut the chicken into small bite sized pieces. Add them to the skillet, season with salt and pepper, then give them a toss with the onions. Brown them slightly, but don't cook them all the way through.
In a large bowl, toss the frozen uncooked tortellini with the jar of sauce. Add the chicken mixture from the pan, along with half of the shredded cheese. Give everything a good toss until well coated. Pour everything into 2 qt casserole dish. Top with remaining shredded cheese. Bake in oven for 20-30 minutes or the cheese is melted and bubbly. Top with grated Parmesan cheese, if desired.
Tips:
I actually debated about whether or not to partially cook the chicken before adding it to the casserole. It all turned out perfectly, so I guess this was a good idea. Just be careful not to leave it in the oven for too long because then the chicken will be overcooked.
Want to add some other ingredients to it? Add whatever you like! Spinach? Fresh basil? Go for it!
You could turn it into a pizza tortellini by using pizza sauce, and then adding sauteed pizza ingredients like mushrooms and peppers, then adding slices of pepperoni on top.
For a completely different twist, use Alfredo sauce instead of marinara sauce. Love it!
Saturday, March 28, 2020
Crock Pot Lasagna
Ok, so this one is more of a technique than a recipe. I wanted to do a quick and easy something that I could assemble in advance, and then have dinner ready by the time I returned home from work. So I looked in my pantry and fridge to see what ingredients I had on hand, and I just happened to have all the components of a lasagna. Perfect! Now, of course, you can go in any of several directions with a lasagna. Marinara sauce, Alfredo sauce, you could do just cheese, or add veggies, or do a meat sauce, or even seafood, and so on. But at its most basic, in my opinion, you just need 4 components: lasagna noodles, sauce, ricotta cheese, and mozzarella cheese. For me, that's the bare minimum. So that's where I started with this particular lasagna. At first, I was going to just assemble the lasagna in a casserole dish as one would usually do, and then have it ready to pop in the oven the next day. But then I saw a video of someone making it in a slow cooker. THAT seems like the right idea! I just layered the ingredients into my slow cooker and by the time I got home from work, BOOM! A fabulous lasagna dinner was waiting for me! TBH, I was kind of expecting it to be too mushy, or maybe burnt around the edges, but it turned out perfectly! This is definitely something a novice cook can make. Maybe next time I'll add other things to it, meat sauce, etc. For this one, I didn't even really measure out the amounts, but I'll just give you a ballpark of how much of everything I used. I hope you'll try it!
2 lbs ricotta cheese
2 eggs
Parmesan cheese
chopped parsley
salt and pepper
1 lb lasagna noodles
2 jars (maybe about 4 cups?) marinara sauce
2 lbs shredded mozzarella cheese
In a mixing bowl, stir together ricotta cheese, eggs, a handful or two of Parmesan cheese, a handful of chopped parsley, and a big pinch of salt and pepper. Congratulations, you've just completed the most difficult part of this recipe! Now it's time to layer:
First, you want to spray your 6 qt slow cooker with nonstick cooking spray. Now do a generous layer of sauce on the bottom. Next, do a layer of lasagna noodles, uncooked, dry, right out of the box. Break the noodles to fit. Now do a few dollops of the ricotta mixture, and use a rubber spatula to spread into an even layer. It doesn't have to completely cover. Finally, top with a handful of shredded mozzarella cheese.
Repeat layers until you use up all ingredients. I think I did 4 layers, so use roughly a quarter of each ingredient per layer.
For the last layer, I ended with a layer of sauce and then more mozzarella cheese.
Cover and cook it on low for about 4 to 5 hours. And that's all there is to it!
Serve it with extra sauce, if desired.
Tips:
First, be sure to be VERY GENEROUS with your sauce for each layer. It's the extra sauce that will cook the noodles, so your lasagna won't be dry at the end. Come to think of it, I probably used more than 4 cups of sauce. I used 2 jars plus a little extra, but then again, I like a saucier lasagna.
After you finish the cooking, turn the crock pot completely off, and let it sit for at least 15-20 minutes. This lets everything relax and your lasagna will set up better. Now you can cut it into segments for serving, and it will stay together.
If your crock pot has a removable insert, you can assemble it the night before you want to serve it, and just keep it in the fridge overnight. Then, the next morning, be sure to take it out of the fridge about a half hour before you turn on your slow cooker.